What did you do in the 'workshop' today

Beekeeping & Apiculture Forum

Help Support Beekeeping & Apiculture Forum:

This site may earn a commission from merchant affiliate links, including eBay, Amazon, and others.
Giving my warming cabinet its first proper test today. The temperature sensor is fixed near the top of one of the sides with a piece of masking tape. I have eight supers on top at the moment, with part of an old duvet over the top of them and the lid resting on top of that. After about ten hours the temperature is reported to be just over 35°C, having started at just under 22°C.

I've also been out to buy the timber to replace the floor of my bee shed when I move it to its new site. The original OSB floor has bowed where it isn't adequately supported (well, ok, it's probably adequately supported if you happen to be a five year old beekeeper). I will never buy another pre-fab garden shed. They all seem to be very shabbily made these days. I'm sure I'll find a use for the OSB in the new shed though, most probably to make a roof over an outside storage area for brood and super boxes. The first step though is to clear the area I want to move it to, which is currently home to a load of sycamore branches and trunks that will be heating our house this winter.

James
 
The sky has looked quite ugly for most of today, but by mid-afternoon I'd got bored of the threat of serious rain and decided I'd go and empty the remaining stuff from my bee shed, largely abandoned for this season thanks to Storm Brenda or whatever it was called. Things that are used regularly have already been moved out, so it was mostly kit that was waiting until I needed it and then got buried by other bits and pieces. You know how it goes...

Anyhow, as if fate were making a small attempt to persuade me that everything isn't going to hell in a handcart I turned up a stack of rhombus escapes with the price tags still on. They were more expensive when I bought them perhaps eight or nine years ago than the ones I bought earlier this year. And taped to the back of one of them was a nice stainless grafting tool that I have no recollection of ordering.

The shed is now empty of everything but rubbish and I have the materials to make a new floor, so I shall be cracking on with that soon, though I should perhaps dismantle what remains first so I can put the bits that are worth saving under cover until I'm ready for them.

James
 
Salvaged some timbers from a skip
IMG_20220911_104919.jpg
They're not in the best condition - notches, one of the long pieces is cracked/almost snapped, saw cuts, screws and nails etc.

But I managed to avoid the worst and put together a hive stand.
IMG_20220911_125202.jpgIMG_20220911_125224.jpg

One of the legs has a saw cut about half-way through, but I've positioned it with the cut in compression so it should be ok. I've jumped on the stand for load testing and it held!

Had a friend ask, so I've put together a shopping list, cut list and rough assembly guide.
 
I was going to place a cynical comment about lawncare but remembered that mine is mulched with fresh sawdust.
In many many places.
It literally looked like a desert a few weeks back. Between the kids playing out there, the drought and the dog doing her business I'm surprised it's recovered this much!

Nothing the scarifier and a bit of seed can't fix. Might go for clover this time rather than grass.
 
Bought a second hand poly nuc recently (a Maisemore with 3 brood boxes, floor and lid) so I gave that a good clean off and replaced the varroa mesh (it has started to rust). Happy with how it's come out and may well buy a new floor (or make one) and lid to give me 2 nucs in case i need them.
 
Bought a second hand poly nuc recently (a Maisemore with 3 brood boxes, floor and lid) so I gave that a good clean off and replaced the varroa mesh (it has started to rust).
easy enough with the improved design - just six screws an out it comes
 
Made eke's ( I think that is what you guys call them) aka. feeding shims out of 2x4's for all my hives. I was using the spare quilt boxes but IMO 11 inches is too deep and as the nights get colder I thought that the bees could use a little less top space. I used 2X4's because that gives me a 3.5 inch shim and the 2 inch thickness results in a nice ledge when I put my quilt box on. That way I can set a clear cover over the feeding shim, but inside the quilt box, to make viewing the amount of feed in the dead of winter a simple process. I can also lift it and slip more sugar in if they are in need without having to dismantle the whole shebang. On top of that cover I place a down filled pillow and then a piece of styrofoam insulation. All in all the high amount of insulation on top of the bees has made for some successful wintering.
 
Made eke's ( I think that is what you guys call them) aka. feeding shims out of 2x4's for all my hives. I was using the spare quilt boxes but IMO 11 inches is too deep and as the nights get colder I thought that the bees could use a little less top space. I used 2X4's because that gives me a 3.5 inch shim and the 2 inch thickness results in a nice ledge when I put my quilt box on. That way I can set a clear cover over the feeding shim, but inside the quilt box, to make viewing the amount of feed in the dead of winter a simple process. I can also lift it and slip more sugar in if they are in need without having to dismantle the whole shebang. On top of that cover I place a down filled pillow and then a piece of styrofoam insulation. All in all the high amount of insulation on top of the bees has made for some successful wintering.
Sounds like they are cosy for the winter
I've seldom added fondant (candy?) but this is how it goes

IMG_0560.JPG
 
I like the simplicity of your set up, something to consider as I move along. Is that insulation placed right on the frames or is there a barrier between it and the bees.

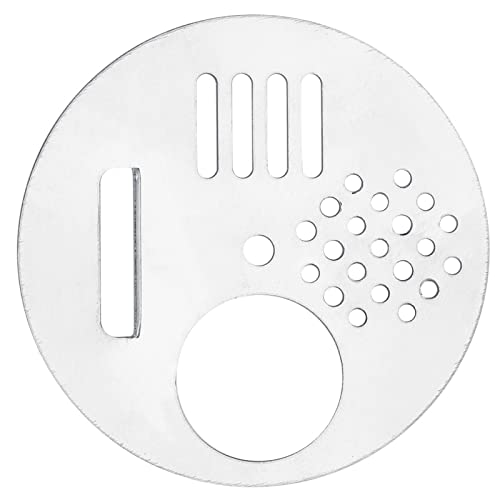
Here is my set up, the screened hole in the side board was for ventilation of excess moisture. I ended up putting a rotating entrance disc over that hole to better regulate but I never opened it all winter as moisture did not ever show on the clear cover. With this set up I can take the top off the hive mid winter to check stores without excess heat escaping and without disturbing the bees if they are up on the sugar. I do put a sleeve of 2.5 insulation all around the hive as well.
IMG_1332.jpgIMG_1338.jpgIMG_1341.jpgIMG_1342.jpg
 
I like the simplicity of your set up, something to consider as I move along. Is that insulation placed right on the frames or is there a barrier between it and the bees.
There is a clear polycarbonate cover board.
If the bees are really low on stores the candy goes struggle in the top bars, rolled out thinly.
 
Today it was my intention to prepare the area where my new bee hut is going to be sited. Or more accurately, my revamped old bee hut. I had a load of stuff to move out of the way including three heaped trailer loads of sections of sycamore that I need to be turning into logs for this winter's heating very shortly. Then I went to fetch the digger to level the ground out a bit, which is where it all started to go wrong. The battery was completely flat, and the front half of the digger was covered in hydraulic fluid :( I have no idea what my father-in-law was up to when he used it a couple of weeks back, but clearly I wasn't going to get anywhere with it today. He did mention that one of the pedals needed lubricating. Perhaps that's father-in-law code for "I broke it, but I'm going to pretend I didn't and deny it was me if anything gets said later". The battery is now on charge and I'll try to deal with the rest once I can move it.

Anyhow, having failed there I got on with dismantling the old shed and trailered it around to the workshop so I can do some repairs and chop off the remaining corroded screws before it gets remantled. That did at least mean I could measure the floor properly so I can do the cutting for the new one, which gives me plenty to be getting on with in the event that the digger isn't an easy fix.

James

 
Perhaps that's father-in-law code for "I broke it, but I'm going to pretend I didn't and deny it was me if anything gets said later".

You can take the man out of the boy; but can't take the boy out of the man..... :icon_204-2::icon_204-2:
 

Latest posts

Back
Top