What did you do in the 'workshop' today

Beekeeping & Apiculture Forum

Help Support Beekeeping & Apiculture Forum:

This site may earn a commission from merchant affiliate links, including eBay, Amazon, and others.
There's a bungalow in a nearby village that's having an extension built at the moment. It has a big stack of celotex outside. I've been quite tempted to stop and tell them that if there's any offcuts left over I'll happily take them off their hands...

James
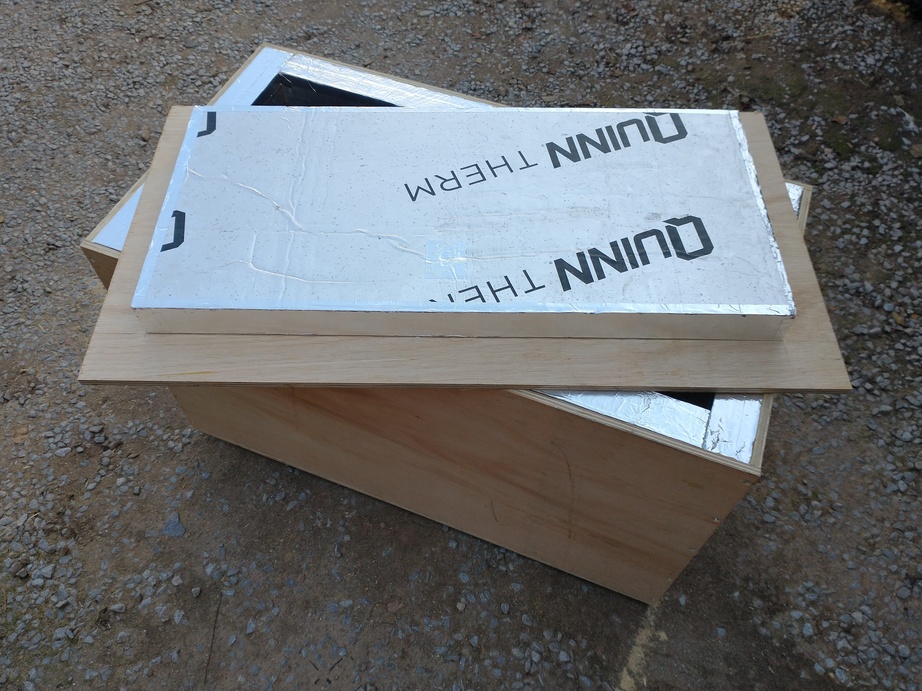
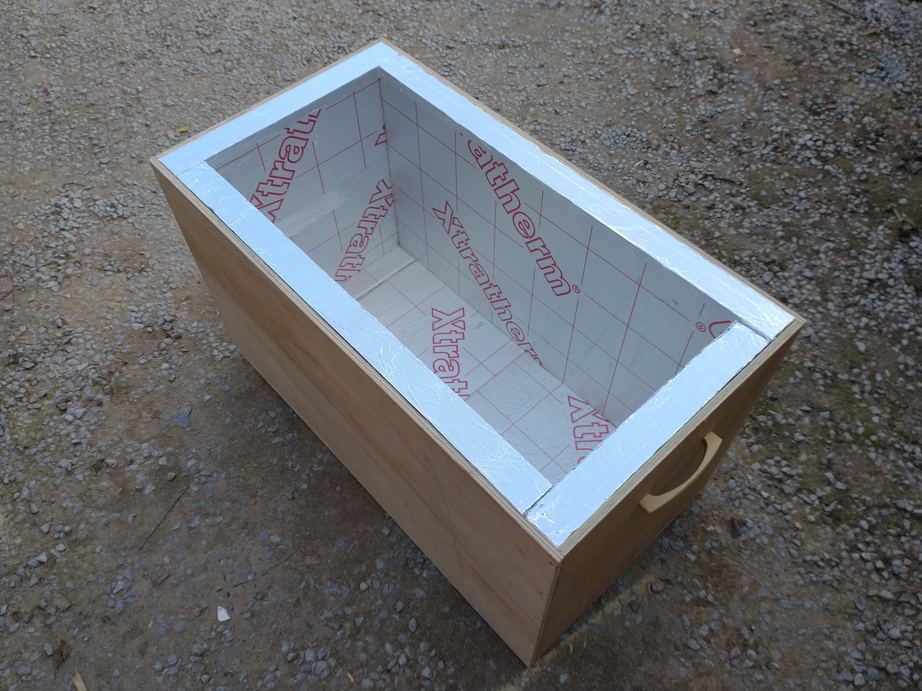
this was sheer chance, we were discussing the spiralling cost of building materials and he had just noticed some celotex I had lying around and asked me what I used it for.
Net thing, as if by magic..............................
 
I was intending to extract today, but my plans went a bit sideways so instead I have spent some of my day in the workshop working on a new warming cabinet. In fact I actually spent some of the time outside the workshop as I don't have sufficient space at present to cut up 8'x4' sheet materials inside. That slowed everything down a fair bit as I had to dodge the showers to actually get everything done.

It would be nice to get everything finished (with the possible exception of a coat or two of varnish) this weekend. As long as I can find a fan and a power supply to run it I think I should be ok.

James
 
Managed to get four ‘covid screens’ from a local shop that had finished with them. They were just a nice size to cut crown boards out of…

I used a cheapy table saw to cut grooves into some battens, then glued them to the Perspex and pinned them in the corners with the nail gun. Surprised myself when they ended up pretty square and pretty solid 🙂.

I’ve wanted clear crown boards for ages so am more than a bit excited about getting them on the hives!

@pargyle I hope you don’t mind me cancelling my request for some from you…

E6DB453E-FA03-4575-A879-B34A4EB7D87B.jpeg66F9BE2D-A788-478D-A75B-E25313071044.jpeg
 
I used a cheapy table saw to cut grooves into some battens, then glued them to the Perspex and pinned them in the corners with the nail gun. Surprised myself when they ended up pretty square and pretty solid 🙂.

Nicely done. I find projects like this can so easily seem to turn into something so much bigger :D

I have a couple of QXes in need of repair -- the wooden surrounds have just reached the end of their lives really and are breaking up. I've cut new pieces of timber and now need to make a 5mm groove up the middle of one of the narrow edges to fit the actual QX into. Only the thickness of the timber is narrower than the slot in the throat plate of my table saw, so really I need to make/obtain a zero tolerance throat plate, though possibly I could get away with fixing them to a sacrificial bit of scrap wood that effectively becomes a zero tolerance throat plate.

The original parts were fixed at the corners with bridle joints and it's probably sensible to do that again because the QX can be subject to a fair bit of force to get it off after it has been stuck down by the weight of a load of full supers. I could probably bodge those using the bandsaw, but really I ought to build a jig to make them properly because it would be much more accurate.

So a couple of hours' work becomes a couple of days' worth :D If it weren't for the fact that I'd use the tools again (like the right angle clamping jigs I made for assembling my toolbox, which have already been used again on another couple of projects), it would be easier to just buy a couple of new QXes :D

James
 
Managed to get four ‘covid screens’ from a local shop that had finished with them. They were just a nice size to cut crown boards out of…

I used a cheapy table saw to cut grooves into some battens, then glued them to the Perspex and pinned them in the corners with the nail gun. Surprised myself when they ended up pretty square and pretty solid 🙂.

I’ve wanted clear crown boards for ages so am more than a bit excited about getting them on the hives!

@pargyle I hope you don’t mind me cancelling my request for some from you…

View attachment 33617View attachment 33618
Nice job ,...No of course not ... I still have more people who want them than I can provide when I get round to making them ..... :)
 
Picked up a large insulated box for free from a local garden centre. Thought I would have a go making soft set using @Gumbers method. The polystyrene may need a protective outer layer adding in due course.
 
Progress with the honey warming cabinet so far.

honey-warmer-01.jpg

honey-warmer-02.jpg

honey-warmer-03.jpg


The table saw makes a beautifully neat job of cutting the insulation :)

I've started cutting the timber for the bucket stand and have the ply for the internal floor sorted, but haven't got as far as assembling those bits yet.

After that it's just the electrickery to sort out and we're good to go I think, though it has crossed my mind that I could fit a pair of wheels at one end to make it easier to move around. Or I could just lift it onto the hive barrow...

James
 
I spent a few hours in the shed scraping off wax moth eaten comb and salvaging the frames ready for foundation over the winter.
 
Selling at a local charity event with some other local beeks on Monday so I knocked together a couple of display stands out of a pallet, then jarred up my final super that I took off and extracted yesterday.
WhatsApp Image 2022-08-27 at 8.11.24 PM.jpegWhatsApp Image 2022-08-27 at 8.45.38 PM.jpeg

As with anything woodwork related from me they're best described as rustic. Fine cabinetry they are not, but perfectly functional.
 
Selling at a local charity event with some other local beeks on Monday so I knocked together a couple of display stands out of a pallet, then jarred up my final super that I took off and extracted yesterday.
View attachment 33633View attachment 33632

As with anything woodwork related from me they're best described as rustic. Fine cabinetry they are not, but perfectly functional.
I think they are great
These are the ones Stan's made

IMG_9061.jpg
 
Spent all day in the workshop today, though not all of it was working on bee-related projects -- I had some brownie point earning to do as well.

I did however get all of the electrickery for the honey warming cabinet sorted out. The wiring still needs a bit of tidying up, but that will probably wait until I've used it in anger a few times so I'm sure the design works as intended -- for example I'm not sure where the best place for the temperature sensor might be.

honey-warmer-04-rotated.jpg

honey-warmer-05.jpg

honey-warmer-06-rotated.jpg

honey-warmer-07-rotated.jpg


I had the temperature set point at 30°C in the last couple of photos and clearly it overshot a little but I don't think that's entirely surprising when it's empty.

James
Nice job James, but I don't understand why you have a socket on the outside of the box.
Re the sensor, mine is halfway up the middle of a short side but I have a fan which moves the air around so probably not as critical.
 
Last edited:
Nice job James, but I don't understand why you have a socket on the outside of the box.

I have lots of spare fans, but they're all 12V so I needed a separate PSU. The easiest way to do that was to put a socket on the outside of the box and plug in a spare "wall wart" for the 12V supply.

James
 

Latest posts

Back
Top