2nd Place at honey show

Beekeeping & Apiculture Forum

Help Support Beekeeping & Apiculture Forum:

This site may earn a commission from merchant affiliate links, including eBay, Amazon, and others.

moby

House Bee
Joined
Sep 20, 2010
Messages
186
Reaction score
0
Location
Yorkshire
Hive Type
14x12
Number of Hives
5
View attachment 5361

I entered my first honey show and got a 2nd for my photographic efforts compared to the other entries and comments it should have done better..... normally I am not a competitive person but after several hours of tinkering following the bees arround and cursing I managed to get a bee and borage in focus and facing the correct way.... any comments / advice from photographers welcome
 
Well I think it should've got a 1st, if only for the borage :)
 
Having tried to capture a few macro shots of bees with a less than ideal lens I know how difficult it can be. I think you have got a nice picture there.

I am no expert photographer but one thing i have learned about my own photography is that sometimes I need to get closer or crop the photo.

I did that with your shot. Not saying it is any better than the original, but I think it draws the eye more onto the bee.

Might have been better to have posted it in the Microscopy & Photography forum, but you could always post in there for opinions and link to your picture.
 
Last edited:
I once entered the men's fruit cake in the local show, and mine was miles better than any of the others, but it didn't get anywhere.

You just can't get the quality of judges these days.
 
Having tried to capture a few macro shots of bees with a less than ideal lens I know how difficult it can be. I think you have got a nice picture there.

I am no expert photographer but one thing i have learned about my own photography is that sometimes I need to get closer or crop the photo.

I did that with your shot. Not saying it is any better than the original, but I think it draws the eye more onto the bee.

Might have been better to have posted it in the Microscopy & Photography forum, but you could always post in there for opinions and link to your picture.

Thanks your cropping has brought it out will try and keep that in mind
 
Thanks for all your comments much appreciated
 
I think if you had the whole of the bee in the shot you would have walked first - cropping is a valid point as well. Its still a great photo all the same!

rgds

JD
 
Hi Moby

I'm not a professional photographer btw but just some things i've picked up over the years.

When taking or cropping a photo, divide the photo up. By that I mean horizontally and vertically, into 9 sections. So two lines down and two lines across so it leaves 9 roughly equal sections. Where the lines cross (4 locations in the picture) place the subject. The bee. So if your good enough do this as you take the photo, if not during the crop. (Edit - the reason for this is the brain likes the positioning of the subject here).

If you intended to have a softer focus of the borage in the background then thats the way its supposed to be. But if you wanted it all pin sharp and your camera is manual or has manual light settings. Close the f stop down fully before you take the photo. This will give back to front sharpness. If you want the subject pin sharp, open the f stop full. But it will blur out the background wonderfully and makes the subject truly the subject.

Focus is everything.

If I were taking this picture I would have done a few things different. I would have caught the bee in flight. Level and majestic legs outstretched would have given the photo drama. I would also have used the flash. This would have given the photo warmth. But not full flash. Supressed flash. If you have not got that, you could try a similar effect by using the red eye reduction flash. It flashes a millisecond before to close the iris of peoples eyes. But some would have lingered. However you would have lost a photographic effect (if I remember rightly) called cote a jour - thats not how its spelt im sure I have cocked that up, but basically its where light highlights thin filament things from behind. Like the hairs on the borage. Sunlight shining through someones hair from behind and round the edges. Its a wonderful effect. So you'de have to take many photos, at least 50 to 60, to search through them for the right light levels versus action, versus focus. But focus always comes first.

If you have a basic camera, it will automatically select light levels, but ou can trick it two ways. Focus on something the same distance but darker, like earth or a tree trunk. Then swing back to your subject. It will be very bright. And it will stay like that unless you release the focus button. Or you can hover your finger over the sensor and move it in and out to change how much light reaches it.

Same with the flash if its just a blaster. Cover half the flash sheet over with your finger. And reduce it until you get the right light levels.

I hope i'm not going on but I truly love photography because it is or was one of my passions. And growing since being just 5 years old, I have always had a camera. I would save all my money just for the film. And then wait years to have them produced. I have even got one from my teens (some years ago now) hidden away waiting to be developed. Like a bottle of wine I spose, I am waiting for the right time to have a look at it. Best of luck and please can we see your others.
 
Hi Storm

I am only a novice and my camera is sort of half decent basic finepix digital slr S6500 obviously it does have its shortcomings which I am finding out the more I ask of it though

When doing macro photography are you saying that the subject needs to be dead centre of the 9 blocks?

What about having the frame divided into 3rds or is that only for landscape type shots?

I was going for the softer focus on the background however didn't quite achieve that on the closed buds on the left of the bee.....

I have tried to catch them in mid flight however it is quite difficult nature doesn't tend to do the expected/anticipated will keep on trying?
 
Hi moby the dividing thing is known as the rule of thirds. An explanation of it can be found here http://tinyurl.com/62dm2j

It explains where to place the subject. And the rule applies from macro through to landscapes. There is one exception and that's portraits of people. You have to be careful when using it with people but this will do for starters.

You were going for the softer focus which worked on the background but not on the borage near the bee. That's because it was at the same focal length as the bee and so was in focus. I would have removed the borage there and just left the flower. Got in closer using a tripod or stack of books etc. And focused on the flower. Then waited. Pressed the shutter as many times as i could while the bee was there and kept doing it till I was finished. Then had a look at what I had.

And this is a really picky pathetic point but I noticed it first so I'll mention it - the dead flower on the right. It drew my eye because it's nearer to those rule of thirds sweet spots that are in that link.


Good and unusual example of cote jour - the light is caught from the sunset, coming through the spray of the wave. Technically this is brilliant because they would have taken many photos to get it right, but were always up against the sun setting. So they created something unique.

http://www.artlimited.net/user/0/0/1/5/8/6/1/artlimited_img193482.jpg

ill see if I have any I can show you.
 
Last edited:
This is a beach scene. I had to trick the camera (covering the light sensor) to make it not compensate for the sun shining full in the lens. It looks like a sunset light level, but clearly it too high in the sky for that. The surfer coming out was timed to be on the rule of thirds sweetspot. BUT I still cocked it up. Didnt pay attention to the horizon - it slopes - Doh! But also there is sun lens flare. I like it but it would cleaner without it. I could have prevented it by holding my hand above the camera and my hands shadow falling across the lens and remembering to keep my hand out of shot.

http://www.flickr.com/photos/49544334@N05/6358053065/ by http://www.flickr.com/people/49544334@N05/
 
. But if you wanted it all pin sharp and your camera is manual or has manual light settings. Close the f stop down fully before you take the photo.

Sorry to be a bother

if I wanted to bring it all into focus -F stop? does this relate to shutter speed and focal point?
 
Well on old SLR cameras, there used to by the F stop ring. It had values from (i think it was) F3.5 to F22. If you played with this and looked into the lens you could see what it did. You had the lenses. But there was a sheet of metal that had a slot in it. The slot was flared in a curve. If you closed the setting down to F22 it was at the slots thinnest part. Open it up to F3.5 and it was at the widest part. So his was how much light was allowed into the lens. F22 gave front to back sharpness in the photo. F3.5 gave you pinsharp focus on whatever you had focused on. But in front of the focal length so in the fore ground of your subject was blurred right out and the same for behind it.

Take your doggy photo. The grass in the fore ground is blurred right out. The wind has helped but it is wonderfully done. So the dog is in focus. The background is out as well. So the subject, the dog, is what your eye is drawn to.

What makes this picture beautiful is the summer looking colours. And the hazy atmosphere by playing with the F stops. If that had been front to back pinsharp it would have detracted from the dog. It would say "pay attention to everything". But we just gaze past the grasses but have their atmosphere to give context and look at the dog. The light shining through his coat makes it all summer.

Playing with the shutter speed does other things. You can set a longer shutter speed. But this will allow more light (as it has more time to get in) through the lens. If you wanted to take this photo as say, half a second, and you had the F stop open at max for soft focus foreground and background, this would have probably bleached the photo out. To compensate that you close the f stop down. But then it will have more pinsharp focus. You have to decide what you want most and play with the variables.

Slowing the shutter speed though turns a crisp (I can see every drop) waterfall picture, into a beautiful ethereal drape of misty water. Very atmospheric. It lacks drama but hast atmosphere. Speed the shutter up and you get less light in, so you have to compensate by opening the F stop to allow more light in but you have the bluring effect and will not get back to front sharpness. So your manual focusing has to be bang on. Or the whole picture will be pants.

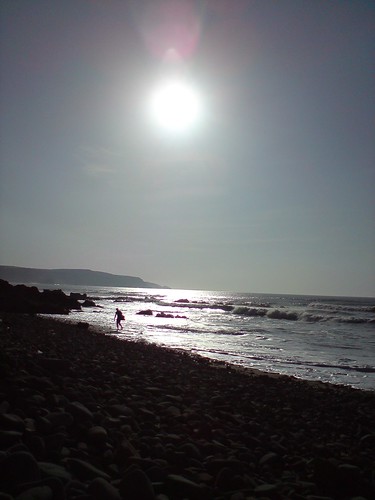
Then to throw more variables in you ave the flash. With your photo you got Cote Jour. Brilliantly. If this had been a person you would have the effect but the face may have been in shadow. So you would use the flash to bring out her face as wll as the cote jour.

If your interested (as I did many years ago), if its still running - amature photographer - ran a correspondence course. You entered and they sent you assignments. You sent them back and they marked your efforts. I have to say as a 12 year old (they didnt know I was that young) posting my film off, then sending the photo to AP, it was so exciting to wait to see if you had passed the assignment. And you got a certificate at the end of the year. I would imagine there are various online versions of it.

With modern point and click boxes, all the same effects can be obtained as a good SLR, you just have to understand about what does what and then trick it.

Just one other rule, colour clashes. Colours that appear opposite in the colour wheel. Our brains love it. So say a person wearing a post box red shirt in a field of OSR, would really get the brain humming. lol. Hope that helps and I know my explanation was probably arse, but there is a world of online experts that can explain it far better than me.

Edit - sorry to go on but there is another valuable light level trick when you have blue skies. The sky will always look bluest in the part of the sky opposite the sun. Have a look. Its a much deeper blue. So if you want a very blue sky in your subject, move round it so that the sky opposite the sun is in the background. Or, if your camera can have attachments get a polarising filter. Of not - like mine - you could use a pair of cheap polarising sunglasses over the lens held in place with a rubber band. Same difference but lower grade optics. But still, you will be amazed how it brings out primary colours in a photo.
 
Last edited:

Latest posts

Back
Top