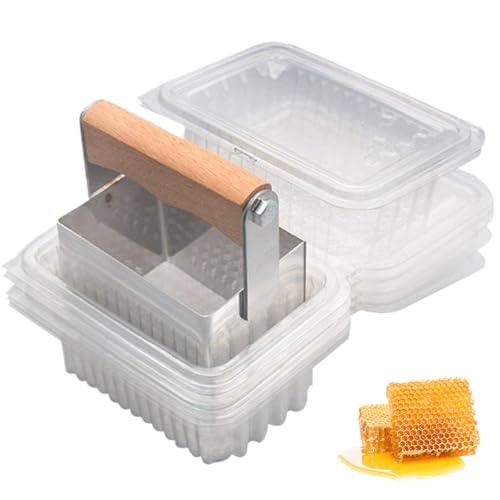
Feeder design

Beekeeping & Apiculture Forum

Help Support Beekeeping & Apiculture Forum:

This site may earn a commission from merchant affiliate links, including eBay, Amazon, and others.
Ahh you were after the hunting haggis. There is a slight difference between that and the tourist haggis we had in Arbroath.
 
If you are ever in Peebles I would highly recommend the haggis from the butcher there. We still have a few in the freezer and they are amongst the best we have sampled, as is the steak mince. My beloved was struck dumb by the mince, "I've never ever tasted anything like this before, as you sure this is mince?" LOL

PH
 
I have Lang poly feeders from LP in Sweden....bottoms sloped
Smith /Nat polys from Nakka is Sweden..bottom sloped
Poly Lang size from Betterbee in USA (actually made in Canada).bottom sloped
Wooden Lang size also from Betterbee.......bottom sloped
My own mould for wooden Smith size......bottom sloped.

That seems fairly comprehensive, will see if any of the local suppliers here do similar

Once they have taken all the syrup.....and they even suck the straw bone dry.............most of the bees are no longer hanging about in the feeder.

However, even if a few are, you just pull the straw back to one end of the feeder.................pour in your syrup, and then let the straw moved back across the top to where it was before. If you do not like that just lift it out, and after refilling stick it back on top..............or given that it is bio degradable and dirt cheap............ discard and use fresh.

Worth pointing out that this is a great AUTUMN way to feed, adds weight rapidly...........sometimes get the full 14Kg into a poly deep in under 48 hours. Its a little more problematic in spring, where expansion and comb building instincts are strong.......... and in the bigger colonies you have to watch for bees going up into the feeder, hanging in there and building wild comb......................in which case you should possibly have considered adding an excluder and a super rather than a feed, or extra brood space and a feed.

Very helpful as always, thanks
 
were you drinking the malt when you seen them? as they only have 2 legs, one shorter than the other! Or at least thats how they used to be around the Cliffs at Arbroath

Arbroath was a funny place, the only town I know that had two distinct subspecies of haggis roaming around. The one to the east , which is the only one left today, the tourist type as you describe, used to be a threatened subspecies due to predation. The Orsi brothers used to drag them out of their nesting burrows in Dickmont Den and fry them in batter in their shop beside the harbour, and locals were so desperate to buy that they used to queue out into the street. Now the conservation programme is in place their numbers are growing again. Eyewitness accounts of them running about are increasing, and successful observation sites are easy to find. The empty Buckfast bottles beside a park bench means it is a likely spot for someone to have been seeing such things.

The fate of the subspecies to the west of town remains rather a mystery. They appear to have gone extinct, yet no hunting of these took place that anyone can recall. They were so well known locally that they even named the football stadium, built near their favoured haunts, after the subspecies, although they did shorten the two word descriptive name of the creatures to a single compound word at the time. For some reason, despite there being a reasonable number of them around, it seemed that they just failed to breed successfully.
 
That seems fairly comprehensive, will see if any of the local suppliers here do similar

They have rather missed a trick if they did not incorporate that feature, but it is hardly a fatal flaw. Use with same observation as you would a flush bottomed wooden one. However, once you are used to sloping ones and just sticking them on as you would like, having to assess the slope direction on ones that are marginal one way or the other is an irritation. ( minor I might add, not a REALLY grumpy old man!)
 
Confirmed by Wynne Jones that their poly feeder is a Sweinty and has a sloping bottom.

If it is the one for the Nationals/Smiths you are referring to then it is not actually a Swienty.............but supplied though them. It is the one referred to as a Nakka in my list, and is in actual fact originally designed for a Swedish National and usd in our system due to the external dimensions being identical.

It is designed for use with TOP bee space hives, thus flat bottomed, and you need to attach a bead round the edge, or use a framed excluder or the likes as a spacer, or clean the top bars perfectly so it will sit down flush.

Ahh, good point, thanks
 
Well, I had a play over the weekend with a variety of power tools and some scrap timber and have come up with the following design for an Ashforth with a sloping floor. I think it will work, though it lacks the panache of Monsieur Ab's more avant garde styling. I've found some perspex off-cuts that will work for lids to stop the bees getting into the main feed volume, but I'll save cutting those until I've made a few more.

The sides are 120mm high and cut from 18mm ply. The floor is 9mm ply and the baffles are 12mm ply. I think I could probably get away with using 12mm ply for the sides and 9mm for the floor and baffles, but I'd be concerned about the lack of depth available for making the joints. I'd probably have to just make glued and nailed butt joints instead, or make finger joints at the corners which is a lot more faff (at least until you've made the jig for cutting them).

View attachment 5645

View attachment 5646

View attachment 5647

View attachment 5648

James
 
Feeders

I made a couple of Millar type feeders last year, a bit of a faf though, and for 6quid for a cheapy from a main supplier, some things are worth making and some things are not !

Dave W
 
12mm ply for the sides and 9mm for the floor and baffles

Don't try to be too clever with the thickness - a part-full feeder that needs to be removed will be heavy and they need to be rigid, particularly the floor to 'tank' side where the bees come up.

Mine have flat a bottom and nearly any leakage that might occur would be to the exterior. OK, they have never leaked yet, but there is always that risk.... The internal tank side is tightly fitted to the tank floor and is an area of potential leakage point into the hive, so needs to be a thick section, I reckon.

Not sure of this sloping side thing - you may well finish up with them being fixed securely in position, on the non-beespace side, unless you add another false floor.

I use the 'ball bearing in a saucer' principle, or a spirit level, for levelling the hives using pieces of wood under the stand legs. Usually the addition of a 6 mm thick strip under two legs or a couple extra bits (if uneven between the stand legs) is enough for the slope after I decide which way I wish to fit the feeder. An alternative would be a simple strip between the hive floor and the stand.

'Fraid I like the principle of a sloping floor, but it is easier to execute with a moulding than a sectional assembly. At the same time, I have never been bothered by the simple flat floor design. I originally used ply as the baffle (a 'loose' fit) and those are the only bits that have deteriorated. I think the feeder floors were likely 1/2 inch ply in those days.

Hope this helps you refine yor design. And, yes, I have had to remove heavy feeders with liquid slopping around, before now. I am lucky, maybe, that I don't have to harvest as much honey as some, and have not actually used my Asforth feeders for about six years.

While I don't like these flimsy plastic things, they certainly have an advantage when they will stack/store one inside the next! I look at my stack of feeders and think what else could I use them for?

Regards, RAB
 
Not sure of this sloping side thing - you may well finish up with them being fixed securely in position, on the non-beespace side, unless you add another false floor.


Thanks for the comments, RAB. The potential for the above problem had occurred to me, but I decided there's only one way to find out :) I guess if the brood numbers are decreasing sufficiently at feeding time they might ignore the extra space, but who knows? I have a fair few to make, so I might try a reduced floor slope and a flat floor to see if it makes any difference.

I did actually consider not carrying the floor past the first baffle (the one the bees climb over, rather than the one the syrup flows underneath), but instead rebating the feed volume side of that baffle and fitting the floor into the rebate. It would have the advantage of supporting the floor properly along its entire length, avoiding the weakness caused by cutting the access slots for the bees. As it is I've glued and nailed the baffle to the walls and then glued and nailed the floor to the underside of the baffle.

Spending pretty much all of my working week sitting at a desk in front of a PC, it's fun just to break out the tools and try these things out, to be honest.

James
 
Hi James, if you don't fit a board to make the underside of the feeder level you'll end up with loads of wild comb full of syrup in the space above the frames. (it usually happens when feeding and apiguarding at same time, using a narrow eke, which is similar to what you'l be doing on one side of the hive)
 
crikey - surely the slope needed is only a couple of mm across the 400mm of the feeder. have a tight bee-space at one end and a generous one at the other? as rab says easier to just wedge the hive slightly on the stand.
 
have a tight bee-space.

The Doc has nailed it. Make your Millers with a 3mm bottom gap, place it at right angles to the main slope, minimal wasted syrup, no escaping bees.

If you still have a problem then suggest you switch threads from 'feeder design' to 'how to build and level a hive stand'!:reddevil:

Whats all the excitement about?
 
I wasn't talking about the gap between bee-side and syrup-side (i use mesh over that after having a few too many deaths).

No i meant underneath the slope. beespace of 1/4 inch (6mm) at one end and 3/8 inch (9-10mm) at the other.
 
surely the slope needed is only a couple of mm across the 400mm

As long as the floor is selected for up and down side. Most (cheaper) ply will have a distinct 'dish' and as such 2mm is minimnal. Just try it - a 400mm square of thin(nish) ply will spin easily,one side up, on a flat smooth surface, but will not when the other way up and the edges are on the surface.

if you don't fit a board to make the underside of the feeder level you'll end up with loads of wild comb

Sorry, I thought I covered that with: Not sure of this sloping side thing - you may well finish up with them being fixed securely in position, on the non-beespace side, unless you add another false floor.

The bottom will then need a bee space lip unless running top bee space (mine are TBS)

I wasn't talking about the gap between bee-side and syrup-side (i use mesh over that after having a few too many deaths).

I left mine with a larger gap - the bees will clean the feeder once the syrup has all gone at the floor if they can get in. No mesh needed - a very small gap can be left under the baffle to prevent bees getting through. Deaths usually occur because the bees access the tank before it is empty (wrong slope of floor) or the tank is filled without checking after it has been completely emptied. Mine were 100% successful after I found a slope in the right direction was definitely needed!

With mine, I simply screwed the baffle plate to the 'internal' tank side (with spacers between the two). I wanted to take no chances with getting the space wrong and for it to be easily removed, if I needed to make it a rough surface later. It made painting/sealing the inside at that end an easier job, too. That is also possibly a better bet if you are going to use ply - the fewer rebates in the ply sides, the better.

RAB
 

Latest posts

Back
Top